3 Vital Resources for Beginner Graphic Designers

Graphic Design, like many other hobbies and professions, has become more accessible to learn due to the vast amount of help and knowledge on the internet. There are thousands of YouTube tutorials for Photoshop or Illustrator as well as online classes and articles that could get you started. Within days, you’ll be on your way to creating awesome designs and logos.

The problem you may run into is an overwhelming amount of resources trying to guide you in every which way. With so many options to choose from, and so many different styles to sort through, it may be difficult and time consuming. Here are some resources that can be vital for beginner (or any) graphic artists:

  1. Canva.com

    Canva is a great resource for designers who do not have access to programs such as Adobe Photoshop or Illustrator. While it may not be as feature-rich as these programs, it is user-friendly and will get the job done for most basic design jobs. The program allows you to upload photos, browse through a large selection of stock photos and patterns, and use cool pre-loaded fonts.

    What may be the best part about Canva – besides the fact that it’s free – is it’s compatibility with print design. Most online design programs lack this feature, but Canva allows you to design custom page sizes so that there are no issues in enlarging for print. This way no quality is lost when printing full size.

    Another print-specific feature is the ability to export files with crops and bleeds. This is required by nearly all printers, and can be a pain to fix if it is not set up right. With Canva, you will end up with a High Quality PDF that is ready for print.canva | graphic design tool for those who don't have photoshop

  2. Coolors.co

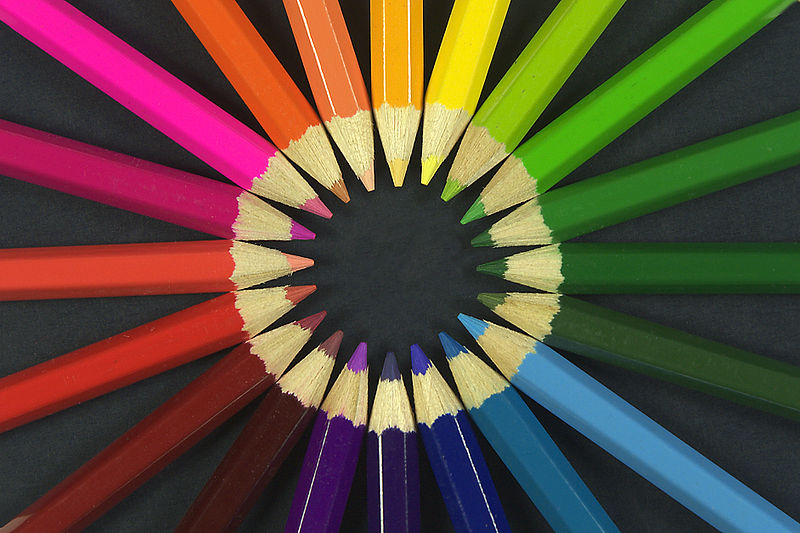
    This super simple color palette generator quickly identifies colors that work well together. This is great for getting some inspirations for design based on a few complimentary colors. coolors | color scheme generator for graphic designers

    This tool gives you the option to select colors by Hex value, CMYK, RGB, PMS or Copic Value. You can then lock one or more colors and produce an array of colors based on that locked value. It even gives you the option to change the hue, saturation and brightness of your colors, making the tool super flexible.

  3. freeforcommercialuse.net

    Stock photos website for graphic designers

    Sometimes, it doesn’t make sense for you to go out and take photos for a design you are working on. With the vast amount of images that are on the web, it is usually easier to just put in a search of what you’re looking for, and find it that way. There are two minor problems with this, however. First, a lot of photos have licensing restrictions on them, so you cannot use them without giving proper attribution. Second, because there are so many photos to choose from, it may be hard to sort through all of them to find a high quality and relevant photo.

    Freeforcommercialuse.net is a directory linking to some of the best stock photos available. Almost all are free for commercial use without attribution. Some of the sites allow you to search for specific topics while others curate daily collections of beautiful photos. Whatever you are looking for, this is a good starting point for designers looking for high quality photos.

Designing for Print

There are many things to keep in mind when designing materials for print that differ from simple web-based graphic design. Using CMYK color schemes, designing with crops and bleeds, and exporting your files the right way are all vital steps needed to get your piece on the press in a timely matter. Visit our info center to learn more about designing for print, or leave a comment below with any questions you may have!

The Earth Day Design Inspiration Collection

Mother Earth by josephine101April is an inspiring month full of colors and new beginnings. A month to celebrate All Fools day, Arbor day and Earth Day as well as a variety of holidays held by many different religions.

It is the month where small animals that hibernate through the winter break out of their slumber, bees and butterflies begin collecting the first drops of nectar made available by early-season flowers and the birds embark on their Northbound journey to settle and mate.

As a tribute to our Earth and the trees that provide us with Oxygen to breathe, remove Carbon Dioxide from the air and give us paper to print and archive beautiful art and genius design with:


Please enjoy this collection of Earth Day art and graphics from talented designers and artists:

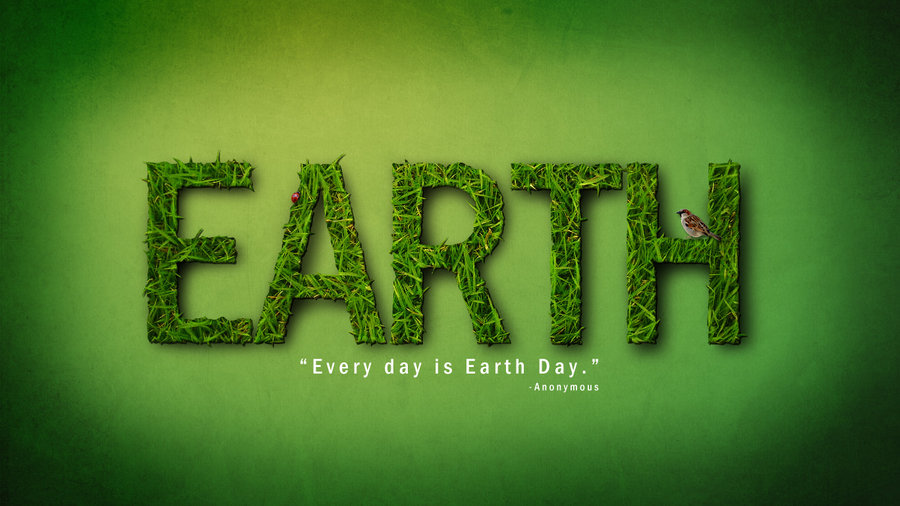
Earth by pixie meat

Earth Day Green Planet by AlexandraF


Earth Day by 'Famz

Happy Earth Day by xDreamx


Earth by klen70


Earth, Fire, Water, Air by Joffi


Earth day by InspiredInsanity


Earth Day by saki jr


How do you celebrate Earth Day?

Please comment below…


Magical Graphic Design: Houdini

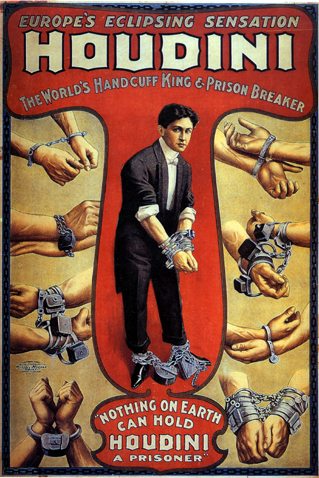
Harry Houdini with his mother and wifeHarry Houdini once said:

My brain is the key that sets my mind free.”

As designers, the key is to keep the creativity fresh and inspired. Thinking outside of the box and out of the ordinary.

Harry Houdini was a creative innovator. His public acclamation came from showing people what they had never seen before, making that which was thought impossible seem possible. Although, for him it was a daily routine. He said it best:

“My professional life has been a constant record of disillusion, and many things that seem wonderful to most men are the every-day commonplaces of my business.”

Yet his inspiration is suggestive of the inspiration that drives a graphic designer to keep designing whether for profit or not: To go beyond the norm and create or build fantasy where none is found.

Here are some fascinating designs inspired by or dedicated to Harry Houdini:


The Great Houdini

The Great Houdini by Tena Letica


Houdini Records

Houdini Records

Harry Houdini by Derkert

Harry Houdini by Derkert


Houdini by Google

Houdini by Google


The Handcuff King

Houdini - The Handcuff King


Magic by Cruenta

Magic by Cruenta


A Kind of Magic by ReptileCynrik

A Kind of Magic by ReptileCynrik


Have any Magical Design Tricks to Share? Please do so in the Comments Below

Easy Photoshop Color Splash Tutorial for Photos and Images


Color Splash Black and White Photo - Plant through Brick

Color Splash Photos with Photoshop

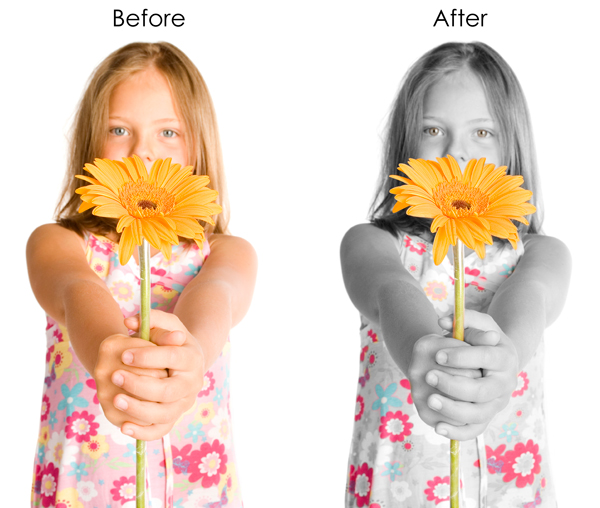
Photoshop Color splash is a method for emphasizing areas or objects inside of black and white photographs, with color. Very popular with wedding pictures and vintage photography, color splashing gives images an extra dimension of beauty: Color can be used creatively to change the perception of the image.


Step 1: Duplicate the Layer

Duplicate Layer in PhotoshopPhotoshop has several different ways to duplicate layers. The one in the image is probably the easiest:

Right-click on the layer and click “Duplicate Layer…”. This will make a duplicate layer above the original.

As you become more familiar with Photoshop you will find that keyboard shortcuts make certain actions faster to do than going through the menus and right clicking. With some practice it becomes a reflex such as typing; you know what keys to press without even thinking about it.

Duplicate Layer Keyboard Shortcut: CTRL + J (PC) or Command +J (Mac)

Step 2: Desaturate the New Layer

Desaturate Layer in Photoshop

Desaturation is a different process in comparison to converting an image to grayscale or a black and white yet renders the same visual effect. Desaturation occurs by pushing the CMYK values of the image towards their respective grey tone.

Photoshop automates this function for us using the Desaturate Adjustment

The two easiest ways to Desaturate a layer are as follows:

*Make sure you have the new layer selected in the Layers palette.

Click: Image>Adjustments>Desaturate.

Desaturate Layer Keyboard Shortcut:

Press Shift + CTRL + U (PC)
OR Shift + Command + U (Mac)


At this point you should see a black and white photo like this:

Desaturated Flower Girl in Photoshop

Step 3: Adding Color with the History Brush

Photoshop History Brush Tool

The History Brush Tool can be used to restore color and other attributes to an image from an earlier state in its history.

Once we desaturate the image, the original color becomes part of that image’s history. By using the History Brush Tool we can then selectively restore parts of the desaturated image to its original color version. In short, we are erasing the desaturation back to color except only where we want the color to appear.

Select the History Brush Tool by clicking on it in the tools palette.

*Make sure your new desaturated layer is selected in the layers palette.

History Brush Tool Keyboard Shortcut: Press the letter Y (Mac or PC)

Begin by setting the brush size to 200px and 0% Hardness.
This gives us a large brush size to work with and the 0% hardness creates a faded finish around the edges of the brush so that we do not end up with a hard edge:


Photoshop Brush Hardness Comparison

Now you can begin coloring in the parts that you would like to have color. Adjust your brush size accordingly to get into those tight spaces and remember that you can zoom in to make sure you add nice clean details to your image.

Brush Size Keyboard Shortcut:

  • Increase Size = [ (Mac or PC)
  • Decrease Size = ] (Mac or PC)

Take a look at the Color Splash I did in Photoshop for this tutorial, it took me less than 10 minutes:


Color Splash Using Photoshop History Brush

Experimenting with the history brush and different brush shapes for that matter can result in some unique and/or abstract photo manipulations.


Show us your skills! Tell us about your color splash project below..

Valentine’s Day Design Inspiration and Free Downloads

Valentine’s Day is here and you know some graphic designers out there are scrambling to complete – or start! –  their Valentine’s Day design projects. Whether it’s for a company promotional project or simply to impress your Valentine with your awesome romantic design skills, everyone needs a breath of inspiration sometimes.

I present to you an inspirational collection of Valentine’s Day art to give your designs a little Heart & Passion:


Be Mine by : Q. Cassetti

Valentine by Alexandra Zaharova & Ilya Plotnikov

Valentines by kwedo

Valentines by Peeewax

Vector Valentine by HyperCannon

Valentine’s Heart Brushes

Hearts Brushes by Hawksmont [Photoshop] – Commercial use: yes

Love Icon Brushes [Photoshop] – Commercial use: yes

Heart Brush Set by Robert Redwood [Photoshop] – Commercial use: yes

Balloon Heart Brushes by Daniel Jordanov – [Photoshop] – Commercial use: yes

Valentine’s Vector Downloads

HQ Heart Illustration [.eps] – Commercial use: yes

Floral Heart by VectorCity [.eps] – Commercial use: yes

Glossy Hearts by OpenGraphicDesign [.eps] – Commercial use: yes

Will you or did you create your own Valentine’s Day Greeting cards this year?

Please leave your comments below…

The Need to Bleed


Bleeds and crop marks business cards
I recently asked my production manager and the graphic department manager here at Marsid M&M:

– What is the most common mistake that you find in artwork submitted by customers?
Answer: Missing Bleeds.

They also added that it is one of the biggest causes of delays in the customer receiving their order. It’s a fact that many businesses hire outside designers and when we contact the customer about the missing bleeds, it can take a matter of minutes to a matter of days to get the adjustments made by their designers.

Unfortunately our graphic department cannot always add the bleed because the file is not editable which is a whole other blog post (coming soon).
If we can add the bleed ourselves, we do it free of charge as a courtesy to our customers.

Bleed and Crop Marks

What is Bleed?

Some designs contain graphics or solid backgrounds that reach the edge of the paper as shown above. Printers require an additional stretch of these graphics or solid backgrounds, usually about 1/8th of an inch called a “Bleed” in order to guarantee the edges are not left without ink when the paper is cut.

Stack of paper showing bleed being cut

Quick tutorials: Adding bleed to your artwork

The easiest thing to do to prevent forgetting to add bleed is to simply make a bleed guide as the first thing you do when beginning a new design. Some professional design software makes this incredibly easy to do, some you have to do manually (still pretty easy).

Adobe Illustrator LogoAdobe Illustrator:

Illustrator offers one of the easiest and most convenient ways of adding bleeds to your documents from the start. In the “New Document” dialogue, under “Bleed” enter 0.125 in to any of the columns. If the link chain is selected already, then it will populate all 4 fields with 0.125 in automatically.

Add bleeds to an Adobe Illustrator Document


As you can see below, your bleed lines are added automatically. Shown as a red frame around the artbox…

Adobe Illustrator Bleeds


Adobe InDesign LogoAdobe InDesign:

In the “New Document” dialogue, make sure the “more options” button is pressed and at the bottom has a “Bleed and Slug” section. In the bleed box type 0.125 in and if the the link chain is selected it will automatically add it to the other 3 boxes.

Adding Bleeds in Adobe InDesign

Similar to Illustrator, InDesign automatically adds the red frame around the artbox as a guide for bleeds…

Adobe InDesign Bleeds

Adobe Photoshop LogoAdobe Photoshop:

In the “New” dialogue window, add 0.25 to the desired finish size. For example, if your designing a postcard that has a finish size of 5 x 7, then you would enter 5.25 x 7.25.

Add Bleed to Photoshop

Once you click OK, your empty canvas will appear and we will use the Rulers (View>Rulers) to use as guides to center our 5 x 7 within the 5.25 x 7.25 canvas and therefore make the bleed areas visible. Pull a guide from the ruler for each side of the canvas and drag it until it is 1/8th” inside the canvas from the edge.

Adding Bleed Guides in Photoshop

Photoshop Note:

We do not suggest using Photoshop for layout and typesetting of print projects. For best results use Photoshop for image manipulation and special effects. Import or place the image or object in Illustrator or InDesign for layout and typesetting.

Photoshop is a raster design program which uses grids of pixels to compose an object. Illustrator and InDesign create vector art which is composed of lines and curves or “Paths” to create objects and therefore create sharp edges and lines for both objects and text. Vector can also be scaled to extremely large sizes without losing quality.

Bookmark Worthy: Print-Ready Design Checklist

Use the checklist to double check that every requirement is already in your artwork to avoid any issues or delays!