
Creating a die line for die cutting can be pretty simple or can be quite difficult, all depends on your design and some planning beforehand can come in very handy later on.
First, I want to make it clear that die cutting thin lines is not always a good idea. Thin lines in a die create thin cuts in the paper that can easily bend or rip off. Sometimes it’s unavoidable such as die cutting hair or thin fonts but if possible, always try to use thick locks of hair or bold type if your die cut is typography-based.
Custom Die Cut Hang Tags
For this tutorial we are going to create a Die Cut Hang Tag. Many clothing manufacturers use hang tags to brand their merchandise and sometimes include information about the product or the company on the back or inside if it is a folding hang tag.
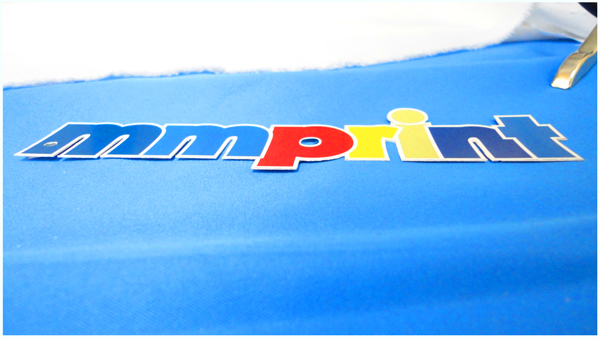
For this tutorial, we will use a fictitious Clothing Brand called mmprint.

Our goal is to have a finished hang tag where we will die cut the mmprint with the white Stroke around it. Leaving the grey area (which for purposes of this tutorial is simulating the paper) by using a die cutter such as our Heidelberg Windmill Letterpress.
The Right Tools
The die line must be made using a vector design program such as Adobe Illustrator or InDesign. A die maker uses a CNC (Computer Numerical Control) machine which uses CAD software to send the design commands to the CNC machine.

Preparing the Artwork
Creating the die line for the mmprint hang tag should be rather straight forward and simple. We used Century Gothic Bold for the text and made an offset path to make it thicker, then added a 3pt. Stroke around it. All we really need to do is make a line that goes around the entire perimeter of the white Stroke.
Sure, you can show off your Pen tool skills and trace the whole thing but working efficiently is key for a designer and when you have other projects to move on to, time is important.
At this point in our design, our stroke is an effect applied to the object. When you select the object with the black arrow, you will see that the selection line is located within the stroke. Since we need the die line to be the outside edge of the stroke, we have to make the stroke an object itself.
- Select the mmprint object then click Edit>Copy then click Edit>Paste in Front
- With the new object selected, click Object>Expand
- While still selected, click the Unite button in the PathFinder tab (Window>Pathfinder)

Now just 2 more steps.
- While our new white object selected, all we need to do is give it a 1pt. stroke (I chose orange so it stands out) and remove the fill color.
Here is the result:

Cleaning Up


Tips and Tricks
It’s always a good idea to consult with the printer/die cutter before you spend a lot of time on your design. Discuss and if possible, show a sketch or basic artwork of your die cut to get feedback on what may or may not work.
As a graphic designer/consultant, you are hired to be efficient and work within budgets.
To save on die charges, you can always use a pre-made Die Cut shapes and customize only the printing.
We offer a nice selection of pre-made die cut shapes:

Take the Design Even Further
When budget is not an obstacle, take your creativity to the next level with Foil Stamping and Embossing.
At this point you can design a hang tag with all the bells and whistles that people may possibly keep. Hang tags create an amazing opportunity to spread your branding with the very merchandise that you sell. Make your hang tag reflect the quality of your company and your product.
So how do you prepare the design for foil stamping and embossing?
Sign Up for our RSS Feed, Follow us on Twitter and Like Us on Facebook to be alerted when the foil stamping tutorial is published.

5 Comments
Vienessa Goodwin
November 4, 2019I have been asked to create files that will be used for making metal dies. I have raster images of cogs and wheels that I have created. I have looked online and cannot find any information with regards to how to create these files with regards to a) Joining the lines to stop the paper falling to pieces once cute and b) how to differentiate between the metal piece, cut-out and embossed section. Any help would be greatly appreciated.
Jom Alex
July 7, 2016Hello Giovanni,
First of all, thanks for sharing this informative article. We expertise in die cut logo printing and this is one of the die cut printing tutorial we are looking for.
Thanks again for sharing this..
Kudos…!
Suleyman
May 28, 2015Hello Giovanni,
We are cutting leather and I needed this for creating raw cutting dies. This is exactly what I was looking for. Thank you for posting this detailed article.
Giovanni
May 29, 2015Suleyman great to hear you found our article helpful…that’s why we do this!
Don’t forget, we can print hangtags for your leather products 🙂
[BLOCKED BY STBV] Creating Die Lines for Die Cut Printing in Adobe Illustrator | Design News
March 24, 2012[…] Creating Die Lines for Die Cut Printing in Adobe Illustrator […]