

After a lot of head-scratching, pixel-pushing, and consideration, your new brochures or business cards are finally ready to fly to the print shop.
But, wait!
The worst feeling in the world is to get an item back from the print shop and see that it’s cropped strangely, the colors are out of whack, or there’s a glaring typo staring back at you.
So, let’s talk about five things you should check before you hit send on that file.
One More Proofread for the Road

On your screen, moments after completing a design is the worst time to check for errors. Your brain is still filling in the gaps and seeing what it thinks it should see, not what is there.
If time allows, walk away from your design for at least an hour. You’ll want to look at it with fresh eyes.
Then, go ahead and print it to scale. Take a critical look at it both at close and, if it is larger than a business card, a few steps back.
Look for images that are out of alignment, text that doesn’t fit quite right, and of course, typos! Check every address, phone number, and email address for accuracy. If time allows, pass it on to a co-worker to perform the same check.
Verify your Color Space
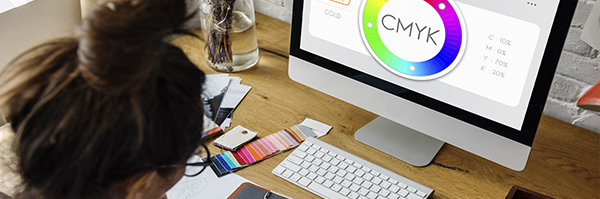
The RGB (red, green, blue) color space is commonly used for digital pictures, like monitors and TVs. It is the color space you’re viewing this article in. By default, most graphic programs like Photoshop will start you in an RGB color space, as it anticipates that the files created will be used for the web.
CMYK (cyan, magenta, yellow, black) is used for commercial printing. In general, when you create a file for print at a print shop, you’ll want to ensure you’re working in the CMYK colorspace. When you first set up the file, you can easily define this by selecting the print presets.
As digital printing has become more common, things have changed and yet, CMYK is still the preferred colorspace for printing.
So, before you hit send, give your print shop a call and ask them which color space they use. This simple tweak can save your new brochure or flyer from coming off the press looking a little off color-wise.
Check your Bleed Settings

Bleeds are important for any document that is printed edge-to-edge, where the solid colors or images need to go all the way to the edge of the page.
While you’re on the phone with the print shop, verify what they’d like the bleed settings to be. We prefer ⅛” bleeds, but some may ask for ¼” or ½” bleeds to give themselves a little more margin for error.
Take a look at your file in your graphics program. Make sure that all your artwork is extended past the bleed line. Also, ensure that all text and important graphics are within the safe zone which is typically a ¼” from the edge.
Some print shops can provide a bleed and margin template, but if they cannot, just create a margin guide about ¼” from the edge of your document and let no important text or graphics past it. This will prevent any important information to be cut off.
Embed or Flatten your Fonts
You spent so much time designing the perfect document and a big part of that is font selection. To ensure that your fonts print properly, you’ll want to embed them into the file. Fonts are pulled from your local computer, so there’s no way to know if your print shop will have the same font.
First, keep a backup of your file with the text still editable. Then, go into your document rasterize each text layer if you’re using Photoshop. If you’re using Illustrator, convert each text element to outlines.
If you’re sending your file as a PDF (and you should be), you can sometimes embed your font directly into the file. This will make your file size bigger but allow the recipient to edit the text if needed.
Some fonts don’t allow you to share them in this way, so it isn’t always an option. Sometimes, all you can do is rasterize or outline them.
Convert your File to PDF
Illustrator, Photoshop, and InDesign files don’t email well in their native formats. They often contain fonts and images that are linked to files on your local computer. When the printer opens these files, they won’t see what you see! Missing fonts, images are only the beginning though. Some files can render differently on different machines (especially if the file was made in a Microsoft Office product like Word, PowerPoint, or Publisher).
So, if you’re sending a file to a print shop, convert it to PDF. If your file has bleeds, be sure to check that the bleed settings are turned on as you export the file. A PDF is a special kind of file that will retain the visual formatting of your file consistently on any machine that opens it. It’s a graphic designer’s best friend.
With these five tips, you’re on your way to having picture perfect files every time. If you’re ever unsure of any settings or requirements, don’t hesitate to call your print shop. We love speaking to our customers and want to make sure your file is formatted properly, so you get great print results from our service every time.
If you have questions or need a quote for your next printing job, leave a comment or give us a call at 877-MMPRINT!
Any tips you want to share from experience?
1 Comment
Paul Adams
October 4, 2019I loved this post and I’m definitely pinning it to share! Each one pretty much touches on a different aspect of design and offer unique perspectives. Thanks!