50 Year Anniversary Badge | MMPrint.com
Search
1-877-mmprint

We Get It Done Yesterday!

Insert Variable Data Fields in Your Design for Print (pt. 3)

Data Field Insertion

After you build your database and save it as an excel (xls.) or CSV (.csv) file, Adobe InDesign makes it very simple to import a variable data section into your design. To do this, follow this guide: When you are ready to import a variable data section to your artwork, open your design file in InDesign. Then,
  • Select “Window” from the top menu
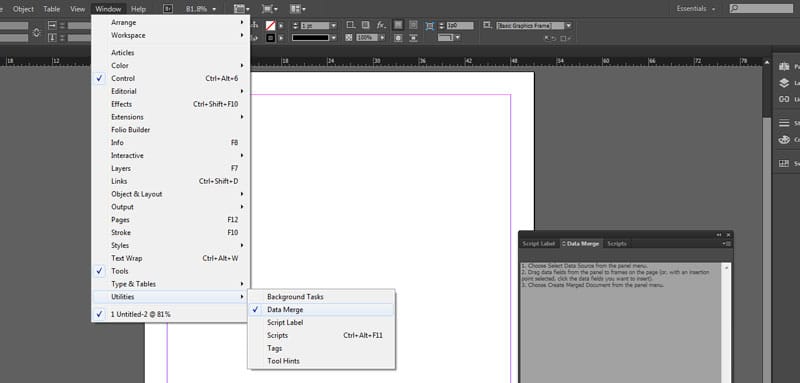
  • Select “Utilities” and click on “Data Merge” as shown below.
A graphic showing the process of data merging. The image shows two sets of data being combined into one set. The data is represented by different colored blocks, and the merging process is represented by a series of arrows. The image is labeled "Data Merging" and is used to illustrate the process of combining two or more sets of data into one
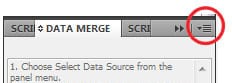
  • A new panel will open with instructions on how to select the data source (the CSV file we created in the first steps).
  • Next choose “Select Data Source” from the panel menu (circled in red below).

*Important – make sure you close the excel file you are working on or else you will not be able to open it in InDesign.

A screenshot of the Variable Data Printing (VDP) Data Merge Panel in InDesign Adobe software. The panel shows a list of fields that can be merged into a document, as well as options for how the fields should be merged. The panel is labeled "VDP Data Merge Panel" and is used to configure the data merge process for a VDP job. Variable Data Printing
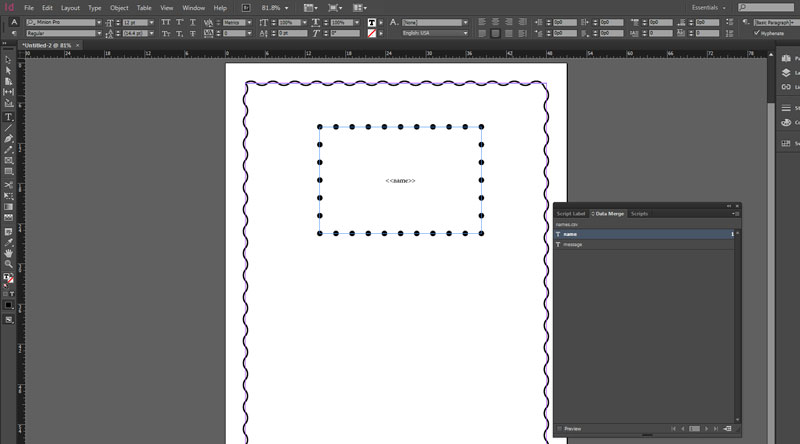
  • In your design, use the Rectangle (or other shape) tool to create an area where you want your variable data to go.
  • After you import your data you will see items with the names of your columns in the Data Merge box. Drag data fields from the panel areas you created. The data will appear as <> in your file.
VDP allows you to personalize each print job with different information, such as names, addresses, and product codes. This can help you to create more engaging and effective marketing materials
  • Click “Preview” in the bottom left corner of the Data Merge Panel to see what the attribute will look like. Now you can adjust the font, color, and size in order to fit the display properly.
*Important Tip – Make sure to account for long names or information in the frame size as it will either get cut off or wrapped to the next line automatically.
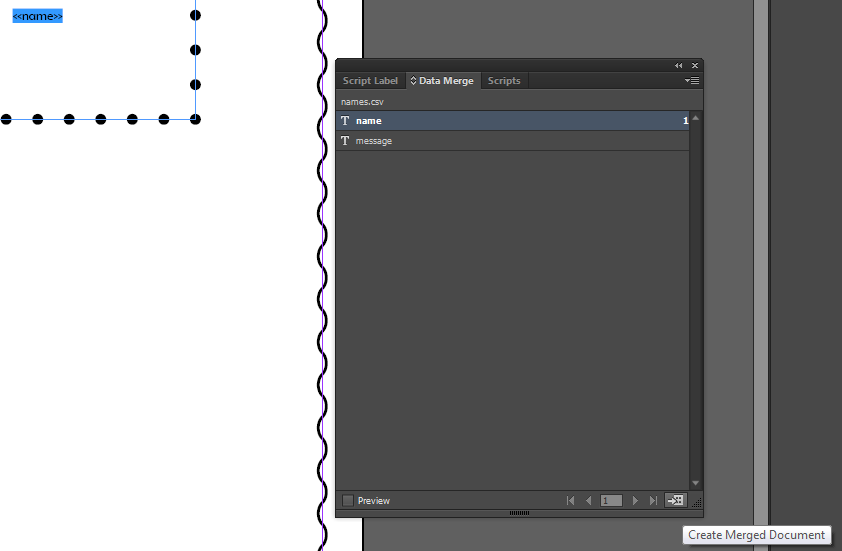
  • On the Data Merge Panel, select “Create Merged Document”. This will open a window with many options to customize the output but the default settings will create this simple variable data project.
Variable data printing (VDP) is a type of printing that allows businesses to personalize each print job with different information, such as names, addresses, and product codes. This can be used to create more engaging and effective marketing materials, such as direct mail campaigns, email newsletters, and sales letters.
  • The final step is to save your document as a PDF. Click File > Export, and select PDF from the Save As drop down.
Additionally, it is important to remember to set up your document correctly, including proper bleeds, image resolution, and the proper use of colors.

Choose a Product